What is a Percolator?
How long do you percolate coffee? Before answering this question, it would help to understand more about a percolator.
A percolator is a kettle with two separate chambers: one for coffee grounds and the other for water. You can get campfire, stovetop, or electric models, which makes it easy to perk coffee.
Do you want to know more about how to make coffee in a percolator? Let’s dig deeper.

How Long Do You Percolate Coffee?
For a standard cup of coffee, percolate it for five minutes. Otherwise, percolate it for around eight minutes to get a stronger cup of coffee. However, percolating your coffee for over 10 minutes can make it bitter.
How to Use a Percolator
Do you know the process of using a percolator? How does a percolator work? If you don’t, let’s explore it.
How Does a Percolator Work?
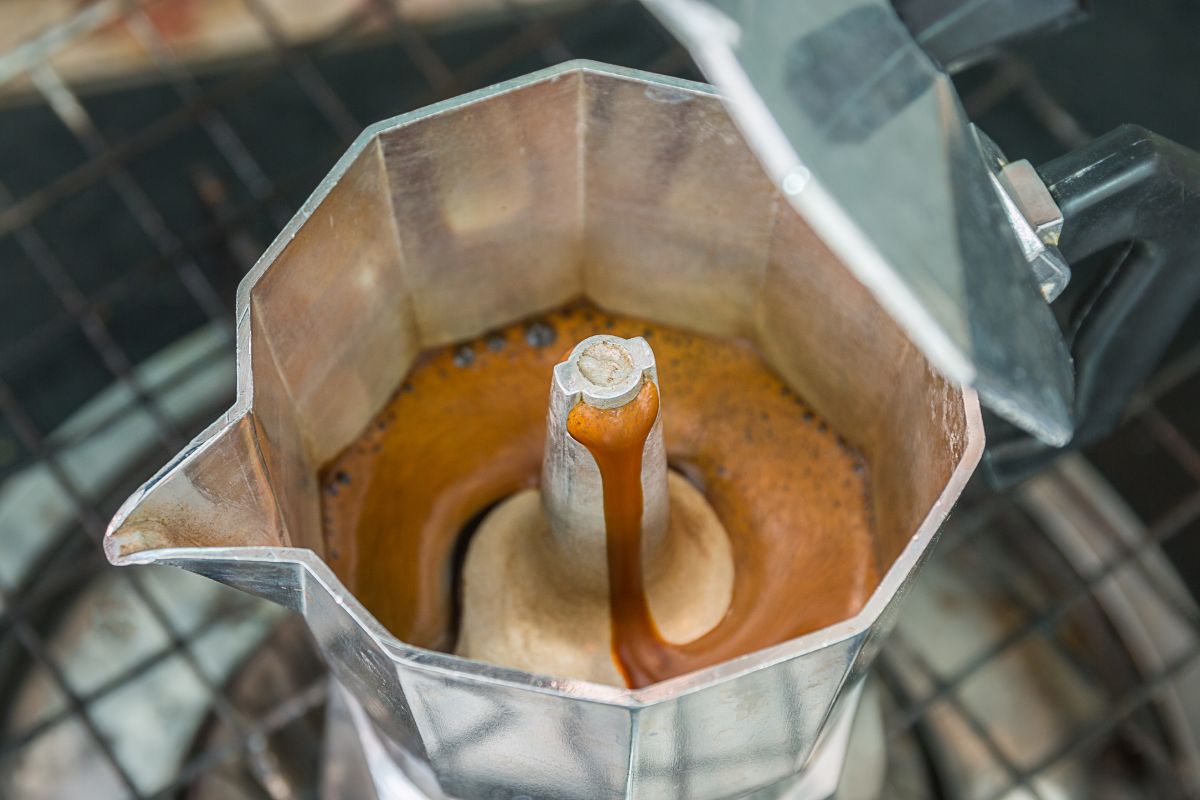
A percolator has a lower and upper chamber. The lower chamber serves as a water reservoir. On the other hand, the upper chamber features a basket that holds coffee grounds.
When you heat the water in a percolator, it gets pushed through a vertical tube, over the coffee grounds, and back to the lower chamber. This process repeats multiple times, resulting in an incredibly aromatic coffee brew.
However, a percolator can over brew coffee easily. Notably, the pour-over and drip coffee brewing methods pass water over coffee grounds only once. In return, it is easy to control the resultant flavor.
To avoid over brewing your coffee when using a percolator, use a timer.
If you are using an electric percolator, use it according to the manufacturer’s directions. However, electric percolators have automated heat sensors, among other components. So they do not require much attention. All you need to concern yourself with is accurately getting the water to coffee.
The Taste of Percolated Coffee
Lovers of percolated coffee describe its taste differently.
To some of its enthusiasts, it has a smooth, creamy taste. They assert that it gets the flavor because the water used in a percolator is hotter than the water used in other brewing methods, including the drip brewing method. So, it extracts flavor fully from the coffee bean grounds.
To others, percolated coffee has an overly bitter, strong taste. However, they like their percolated coffee that way.
However, the most common description of percolated coffee is its deep and rich taste, unlike coffee from most brewing methods, including the French press and drip brewing methods.
The Percolator Coffee Ratio Explained
Do you know the percolator coffee-to-water ratio? If you thought just adding coffee to water would suffice to make a good cup of coffee, you could be wrong. There are several nuances surrounding the simplicity of making a high-quality cup of coffee, including coffee to water ratio.
Typically, one tablespoon of coffee grounds makes one strong cup of percolated coffee. However, you can add one teaspoon of coffee grounds to make a weaker cup.
Notably, the coffee-to-water ratio refers to the amount of coffee you should add to water when brewing coffee, regardless of the brewing method. Also, it is a weight-based formula that applies when brewing any amount of coffee.
Notably, the golden ratio that tends to produce the most balanced cup of coffee is 1:18. The ratio translates to 0.04 ounces (1 gram) of coffee to 0.61 fluid ounces (18 grams/18 milliliters) of water.
It is also notable that the ratio applies when describing coffee strength. If the ratio is high, the coffee brew is light. However, a lower ratio denotes a more concentrated coffee brew.
For example, the ratio is 1:15 shows that a cup of coffee is strong, while 1:18 denotes that a cup of coffee is light. However, the ratio between 1:15 and 1:18 is the mostly used coffee ratio.
Why does the coffee ratio matter? Typically, the more coffee you use in your brew, the stronger it will taste. However, adding more coffee is not the only determinant of your brew strength.
In addition to the amount of coffee you add to your brew, brew time and grind size determine the strength of your brew’s taste. Notably, the grind size determines how much soluble materials will dissolve in your brew during the brewing process.
So, you must balance the three variables, coffee ratio, grind size, and brew time, to make a satisfying cup of coffee.
How do You Measure Coffee Beans?
The following simple procedure applies when measuring coffee beans to grind for your percolated coffee:
Step 1: Tare
Taring refers to resetting your measuring scale to zero after placing a small bowl to hold your coffee beans. This process ensures you only weigh coffee beans without adding the bowl’s weight. In return, you get an accurate weight of coffee beans.
Step 2: Fill
Notably, always measure whole beans and not ground ones. This move ensures that there is no waste. So, fill the bowl with whole coffee beans until you achieve your preferred measure.
How to Use a Stovetop Percolator
Equipment Needed
- Heat source: A stovetop.
- Stovetop percolator: The market offers several types of stovetop percolators. However, the common ones are one to ten-cup stainless steel percolators.
- Measuring scale or spoon: To get an accurate coffee-to-water ratio, use a measuring scale or spoon to measure the coffee beans.
- Kettle (optional): You can use a kettle to boil water first before adding it to the percolator’s reservoir.
Ingredients
- 2 tablespoons (20 to 22 grams) medium-coarsely ground coffee.
- Water (enough to fill the maximum level of the percolator).
Directions
When making percolated coffee, the following steps apply:
Step 1: Clean the Percolator and Add Water
Always clean your percolator before using it. Remember, the presence of leftover coffee grounds in the percolator can alter the flavor of the fresh brew. The second exercise entails filling the reservoir with water while minding the recommended maximum water level.
Remember, the general rule of using a percolator is that two cups of water make one mug of coffee.
Lastly, if you had removed the stem and stand of the percolator to reach the water reservoir, replace them after adding the water.
Step 2: Prepare and Add the Coffee Grounds
The next step is to add coffee grounds to the upper chamber’s basket.
First, measure the coffee beans and grind them until medium-coarse. This texture is similar to the one used to make an espresso shot. It is also similar to the French press grind. However, it is less chunky and feels slightly smooth.
After adding the coffee grounds, shake the basket to distribute them evenly. Afterward, ensure the percolator is fully-assembled, components screwed together, and the lid is in place.
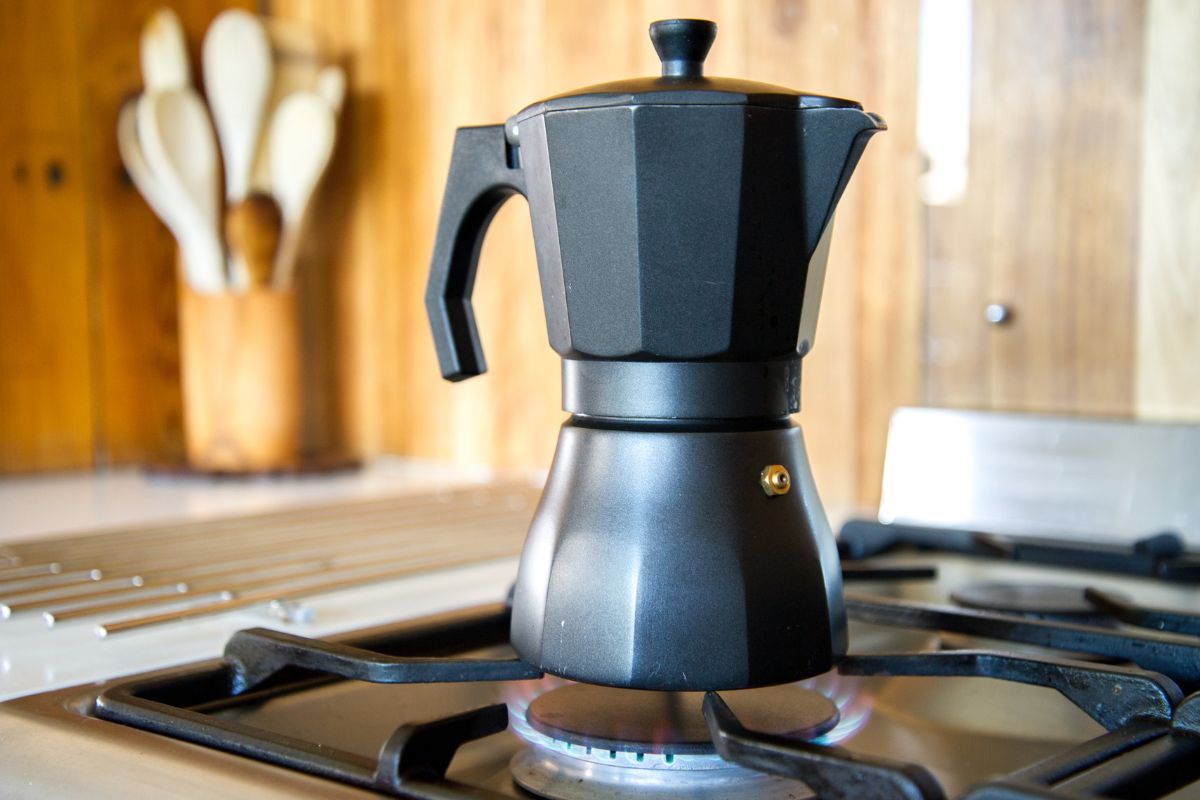
Step 3: Heat
Heat your percolator using a stovetop over medium heat. The heating process should continue until your coffee starts perking. Also, you should monitor the process by looking through the glass top. If the water begins to simmer or boil, reduce the heat.
Remember, no steam should come from the percolator. Nevertheless, using consistent heat is the trick for making quality percolator coffee.
Step 4: Perk!
How long does it take to percolate coffee? Your coffee should perk for five to ten minutes. Alternatively, let it perk until it reaches the desired strength.
Step 5: Resting
After the perking process gets complete, remove the percolator from the heat. Next, use oven mitts to remove the percolator basket and dispose of the used coffee grounds. Afterward, allow the coffee to rest for a few minutes before serving it.
During the resting period, the grounds that had found their way into the coffee settle at the bottom of the reservoir.
The Best Type of Coffee for Percolators
The quality of coffee you can make using a percolator depends on your coffee beans. Given that a percolator brews coffee multiple times, using dark roasts can result in overly-strong coffee.
So, always go for light roasts because they have a low acidity level. Often, they have the label “mild” or “smooth.”
Remember, it is advisable to use coarse grounds. Such grounds cannot find their way to the finished coffee.
How to Clean a Percolator
When cleaning percolators, you should apply caution similar to when cleaning a Keurig machine or drip coffee maker.
Notably, the best time to clean a percolator is immediately after use. If you delay before cleaning it, the used coffee grounds can form a dense cake after drying in the basket. Also, leaving coffee inside your percolator’s reservoir can stain its walls. In return, the flavor of your next brew will get altered.
When cleaning your percolator, use warm, soapy water. Also, use a soft-sided sponge to gently hand-wash the basket, water reservoir, and tube if necessary.
If your percolator has oil residue or built-on stains, use vinegar or baking soda to deep-clean it. How do you do it? Fill the reservoir to its maximum. Afterward, add two teaspoons of baking soda or vinegar. However, never use the two cleaning agents together. Lastly, heat the percolator for 10 minutes, discard the water, and rinse it.
If you use vinegar, add clean water and reheat your percolator until you remove the vinegar’s aroma.
The Difference Between Percolator and Other Brewing Methods
Is percolator coffee better than the one you can make using drip, French press, or pour-over brewing methods? Notably, the quality of coffee brew depends on your taste and preferences. So, it is hard to say which type is better than the other. However, let’s discuss the differences between percolator coffee versus other methods.
Drip and French press coffee have a lighter and more nuanced flavor than percolator coffee. However, percolator coffee has an almost-bitter flavor similar to French press coffee, even though it has a richer aroma than the latter since it brews several times.
Notably, a percolator can make several cups of coffee, unlike a French press machine. So, it is ideal for making coffee for a crowd.
The Different Types of Percolators
Manual Percolators
These are some of the most common types of coffee percolators. Many coffee lovers honor these percolators, which also go by the name filter coffee makers or manual drip coffee makers.
Manual percolators feature a carafe and cone filter holder. Also, some feature a lid for the carafe. Notably, the material that makes a carafe is heat-resistant glass. Sometimes, the carafe’s handle is plastic.
Automatic Drip Percolators
Automatic drip percolators are also some of the most common percolators used globally. They can brew a cup of coffee quickly and are stylish. Also, they feature an auto shutoff removable water tank and a pause-and-serve button.
Vacuum Coffee Percolators
These are some of the most beautiful percolators to watch when brewing coffee, especially the ones with borosilicate glass chambers. The chambers are transparent, and you can watch your coffee percolating. They have a balanced temperature and can make high-quality coffee within 30 minutes.
Stovetop Coffee Percolators
The other names of this type of coffee percolator are:
- Campfire pots.
- Macchinettas.
- Moka expresses.
- Moka pots.
- Stovetop espresso makers.
In 20 minutes, they can make around 12 cups of coffee. For this reason, they are ideal for conferences and meetings.
French Press Coffee Percolators
These types of percolators are also popular globally. Their filters are stainless steel or nylon. Also, they are a favorite of coffee shops and other coffee spots that serve customers on the go. Some of the popular brand names of the French press coffee percolators are:
- Bodum.
- BonJour.
- Chef’s Choices.
- Frieling.
- La Cafetiere.
Advantages of Perked Coffee
One of the advantages of perked coffee is that you can prepare and take it when camping or traveling. In other words, using a percolator to make coffee is very practical. Also, you can enjoy it for a long time because a percolator is a durable metal pot if you take care of it well.
Perked coffee also has a deep and richer taste than coffee from other brewing methods. Also, you can adjust the brewing time to make a cup of coffee with a taste that matches your preference.
Also, the aroma of percolating coffee sets up a coffee-drinking mood even before sipping your first cup.
Lastly, perked coffee stays hot for a long time. This aspect results from the high temperatures used during the perking process.
The advantages of perked coffee fuses with the ones of a percolator. For the old and young generation, the shape of a percolator is reminiscing, given that its invention date was the late 1800s. So, it invokes some ancient memories.
Also, cleaning a percolator is easy. All you need is to disassemble and clean it. This aspect makes cleaning even the hard-to-reach areas possible, thus eradicating the metallic taste due to residue build-up.
It is also notable that a percolator is pocket-friendly. Additionally, it is easy to set up and use, besides being portable.
Did you know you can use a percolator to make other beverages, including espresso? So, it is a versatile piece of equipment.
Lastly, if you want to make several cups of coffee hurriedly, a percolator can come in handy because some percolators can make up to 12 cups at once.
Disadvantages of Perked Coffee
One of the disadvantages related directly to percolator coffee is the risk of becoming bitter because water runs over the coffee grounds multiple times. Also, the coffee may taste like heated coffee, given that coffee gets heated and filtered several times in the percolator.
Otherwise, the other disadvantages relate to the percolator.
Unlike automated coffee makers, a percolator requires practice to make a perfect cup of coffee. Also, percolators can create a mess because coffee has to rise and pool its upper part. If left unattended, coffee may rise and spill on the stovetop. However, you can avoid staining your stovetop by pouring water immediately after coffee spills.
Lastly, a percolator is inefficient because it has no automatic timer. For this reason, you can’t leave your coffee perking and shower and get dressed because it can over-brew and become bitter.
A Brief History Lesson on Perked Coffee
Using a percolator to make coffee is one of the earliest coffee brewing methods, given that automatic coffee makers came onto the scene in the 1970s.
Notably, Joseph-Henry-Marie Laurens, a Parisian tinsmith, invented the earliest known percolator in 1819. Later in 1865, James Nasson received the first stovetop percolator’s patent in the US. However, Hanson Goodrich, an Illinois farmer, made the coffee percolator as we know it today in 1889.
Another notable historical information about percolators was the introduction of ground filter coffee rings in 1970. They were commercially available, and each ring was an individually sealed paper filter containing pre-measured ground coffee.
The rings had a shape of a doughnut. The space in the middle of the ring enabled a coffee maker to place it in the percolator basket around the protruding convection tube. Before the introduction of the rings, coffee lovers used coffee grounds, which they used to scoop into the percolator’s basket.
One notable advantage of the ground coffee filter rings is that they eliminate the need to measure the coffee grounds each time one wants to use a percolator. To date, you can still find the rings in online sources and some physical stores.
But when were electric percolators invented? They were invented throughout the twentieth century, and the production of their new models continues to date.
So, did the popularity of percolators decline? Yes. With the advent of the electric drip coffee maker and better brands of instant coffee in the early 1970s, the popularity of percolators started to decline. The sale of coffee ground filter rings also decreased during the same period.
However, percolators and coffee ground filter rings are still on the market. So, if you are still searching for ways to make the best coffee, try using a percolator.
Summary
A percolator is a sure way of making coffee with a rich and deep taste. Its usage spans several decades. Also, it remains a favorite of many coffee lovers.
This coffee maker is affordable, portable, durable, and easy to clean. So, if you are still experimenting with ways of making a high-quality cup of coffee, go the percolator way.